
tmux
Quick and Easy Guide to tmux
I love working with the command line. Seriously, I think there’s hardly any more productive and more versatile tool for a software developer than the terminal. Maybe it’s the hacker/wizard/powerful kind of feeling I get when using a terminal, who knows? This post will give you the same two minute introduction about tmux and its possibilities, followed by the typical 10 minute hands-on guide to set up and get to know tmux yourself. If you’ve got 10 minutes to spare and finally want to be more proficient with tmux: read on! Otherwise, just us the /quick primer/
TLDR; A quick primer…..
sudo yum install tux
tmux new -s k8s
ls -lR /
# Ctrl-B then D to disconnect. (Tested disconnecting VPN too)
tmux attach -t k8s
What’s tmux?
tmux’s authors describe it as a /terminal multiplexer/. Behind this fancy term hides a simple concept: Within one terminal window you can open multiple windows and split-views (called /“panes”/ in tmux lingo). Each pane will contain its own, independently running terminal instance. This allows you to have multiple terminal commands and applications running visually next to each other without the need to open multiple terminal emulator windows. On top of that tmux keeps these windows and panes in a session. You can exit a session at any point. This is called /“detaching”/. tmux will keep this session alive until you kill the tmux server (e.g. when you reboot). This is incredibly useful because at any later point in time you can pick that session up exactly from where you left it by simply /“attaching”/ to that session. If you’ve ever worked with remote servers or a Raspberry Pi over ssh you can guess where this will be useful: When you lose your ssh connection the tmux session will simply be detached but will keep running on the server in the background including all the processes that run within your session. To continue your session simply ssh to the server again and attach to the running session. But tmux is not only helpful when working on a remote machine. Not only for its window management features but also for the session handling. Personally I find myself detaching from sessions when I’m switching context. I’ll just start a new session for my new task and attach to the old session whenever I want to continue with my old task. You see that tmux basically offers two big features: Window management in your terminal and session management. Enough with the talking already. Let’s get our hands ready in the hands-on guide!
Why tmux?
A response that I get quite often is: “Great, I get it. But why should I use tmux and its weird key combinations instead of just using iTerm2?” And you’re right, when it’s only basic window management, iTerm for Mac supports tabs and panes as well. For Linux there’s Terminator . So why would anyone feel the urge to learn some archaic technology in this day and age? But you’re missing out. There are a couple of reasons why I favor tmux over iTerm et al.:
- session handling: detaching from and attaching to sessions helps me with context switching and remote working
- platform independence: I can use tmux on my Macbook, my Linux notebook, Cloud servers, Raspberry Pis, BeagleBones, etc.
- customizable: there are many ways I can customize the look and behavior of my tmux environment. And I can sync this across different platforms using a simple dotfile
- street credibility: you don’t want others to call you a lamer, do you? :P
Getting Started
This hands-on guide will get you up and running with tmux pretty quickly. It will only cover the basic features which should be more than enough to get started and be productive with tmux. Simply open your terminal and follow the instructions.
Installation
Fortunately installing tmux is pretty straightforward on most distributions a simple sudo apt-get install tmux (Ubuntu and derivatives) or brew install tmux (Mac) or yum install tux(Centos) should be sufficient.
Starting Your First Session
For your first session simply start tmux with a new session: tmux This will create a new tmux session with a nice all-green status bar at the bottom:
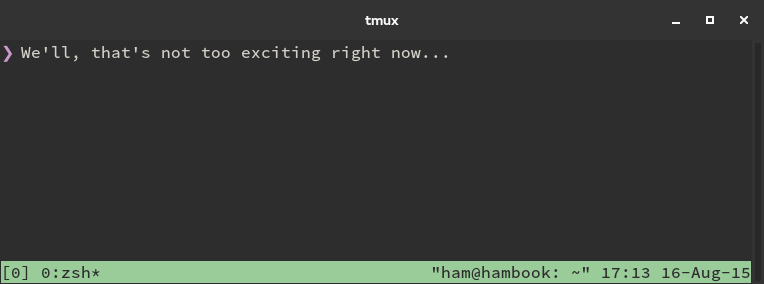 The status bar is an important part of tmux. Apart from the currently opened windows (on the left) it also shows some system information like date and time (on the right). The status bar can also be customized and I’ve seen some really fancy stuff around (upcoming calendar events, battery status, to name a few) but this is something we’ll leave for later.
Splitting Panes
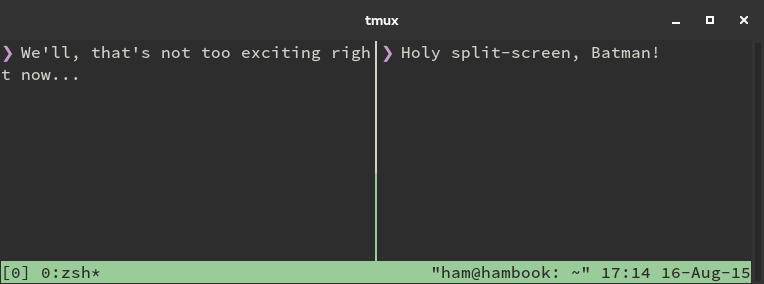
Now that we’ve created our first session we can get a feeling for panes. When you create a new session, tmux will by default start with one window and a single panel inside. We want a nice split-screen, so let’s split this bad boy. All commands in tmux are triggered by a prefix key followed by a command key (quite similar to emacs). By default, tmux uses C-b as prefix key. This notation might read a little weird if you’re not used to it. In this emacs notation C- means “press and hold the Ctrl key”. Thus C-b simply means press the Ctrl and b keys at the same time. The shortcut to split panes into a left and a right pane is C-b %. Remembering what I’ve just told you about tmux’s sequence of prefix and command key this means to split your single pane into a left and a right pane you press Ctrl and b at the same time, release both, and then type the % key. Voilà! You’ve just invoked your first tmux command and split your pane in two.
 Where there’s a split into left and right, there’s also a split into top and bottom pane. To split a pane into top and bottom panes use the C-b “ shortcut.
Navigating Panes
Right now we’re trapped in the newly created pane. But we really really want to go back to the left one. Easy peasy: Switching to a different pane uses the C-b
shortcut, where is the arrow key pointing to the pane you want to switch to. In our case we want to switch to the panel on the left so it’s C-b left for us. Just once more, so that we fully understand this: This means you press Ctrl and b (your prefix) followed by the left arrow key to get to the pane on the left. You can now go ahead and split each of your new panels even further. Feel free to experiment and split your panes like a maniac to get a feeling for it. Closing Panes
Closing a pane is as simple as closing a regular terminal session. Either type exit or hit Ctrl-d and it’s gone.
Creating Windows
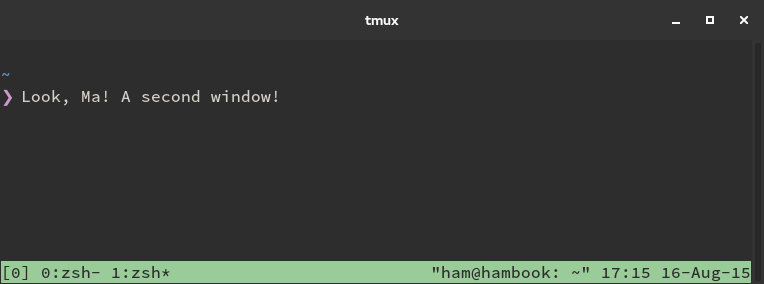
Windows in tmux can be compared to creating new virtual desktops; if you’ve ever worked with one of the major Linux deskop environments (KDE, Gnome) you’ll hopefully find this analogy helpful. Creating new windows is as easy as typing C-b c (one last time: that’s Ctrl and b at once, then c). The new window will then be presented to you in tmux’s status bar.
 You can now divide the pane in your new window as you like. Or don’t. That’s up to you.
To switch to the /previous/ window (according to the order in your status bar) use C-b p, to switch to the /next/ window use C-b n. If you’ve created many windows you might find it useful to go to a window directly by typing its number (the status bar will tell you which window has which number), just use C-b
You can now divide the pane in your new window as you like. Or don’t. That’s up to you.
To switch to the /previous/ window (according to the order in your status bar) use C-b p, to switch to the /next/ window use C-b n. If you’ve created many windows you might find it useful to go to a window directly by typing its number (the status bar will tell you which window has which number), just use C-b where is the number in front of the window’s name in your status bar. Session Handling
If you’re done with your session you can either get rid of it by simply exiting all the panes inside or you can keep the session in the background for later reuse. To detach your current session use C-b d. You can also use C-b D to have tmux give you a choice which of your sessions you want to detach. This will detach your session but will leave you’re doing in that session running in the background. Now that your session is detached you can pick it up from where you left it at any later point in time. To re-attach to a session you need to figure out which session you want to attach to first. Figure out which sessions are running by using tmux ls This will give you a list of all running sessions, which in our example should be something like 0: 2 windows (created Sat Aug 15 17:55:34 2015) [199x44] (detached) To connect to that session you start tmux again but this time tell it which session to attach to: tmux attach -t 0 Note that the -t 0 is the parameter that tells tmux which session to attach to. “0” is the first part of your tmux ls output. If you prefer to give your sessions a more meaningful name (instead of a numerical one starting with 0) you can create your next session using tmux new -s database This will create a new session with the name “database”. You could also rename your existing session: tmux rename-session -t 0 database The next time you attach to that session you simply use tmux attach -t database. If you’re using multiple sessions at once this can become an essential feature. And that’s it! Congratulations, you’ve just completed your first tmux session and got your hands dirty with its window and session management. Yes, there’s more stuff tmux can do. But what you’ve just learned should be everything to start using tmux in the future.
There’s More
If you’re curious now to learn what else tmux can do that’s a great thing. And luckily most of the stuff is quite simple to discover. Just type C-b ? to see a list of all available commands and start experimenting. Some of the commands that I’m using myself quite often are:
- C-b z: make a pane go full screen. Hit C-b z again to shrink it back to its previous size
- C-b C-
: Resize pane in direction of - C-b ,: Rename the current window On top of that there are plenty of resources out there that help you getting further with tmux. People like me are blogging about their tmux experience and share what they’ve discovered. You can find people sharing their tmux configurations in their dotfiles repos on Github. There’s even a book by Brian Hogan dedicated to tmux. For now it’s best to discover some stuff on your own. Experiment, fool around and maybe try to use tmux in your daily work. It takes a while to get used to and you’ll probably feel slow in the very beginning. I can only encourage you to keep using it. Get a feeling for its functionality and in no time you’ll find out that your work with the terminal will be pure bliss and insanely fast. If you’re interested in customizing your tmux experience I recommend that you read my Guide to Customizing your tmux.conf .
Credits
This article was adopted and re-worked based on an article from Ham Vocke from this link: A Quick and Easy Guide to tmux
